 Tagloom
How to Add Keywords to Thousands of Photos Automatically
Every photographer knows the advice: keyword your photos on import. Almost nobody does it consistently.
After a trip you come home with 1,200 frames, you cull, you edit the twenty best, and the other thousand
go into a dated folder with names like DSC_4127.NEF. Three years later you need "that shot
of the waterfall with the mossy rocks" and the only search tool you have is your memory.
This guide walks through why manual keywording breaks down at scale, what the realistic alternatives are, and how to describe an entire archive automatically while your originals stay untouched and private.
Why manual keywording does not scale
A careful keyworder spends somewhere between twenty seconds and a minute per image: look at the frame, decide on the subject, add the place, the season, the mood, a few objects, then move on. That is fine for a portfolio of a few hundred images. At 20,000 images it is two to three full working weeks, and the backlog grows faster than you can clear it.
Batch tools inside catalog apps help a little, but they share a limitation:
- Batch keywords are the same for every photo. Applying "Italy 2025" to a folder is useful context, but it does not tell you which frame has the cypress trees.
- Keyword sets depend on your discipline. Was it "seaside", "coast" or "beach"? Inconsistent vocabulary makes search unreliable.
- Old archives never get done. Even photographers who keyword new imports rarely go back to the years before they started.
The options for automatic keywording
There are three broad ways to get descriptive keywords without typing them yourself.
1. Cloud photo services
Consumer photo clouds recognize objects and let you search "dog" or "beach". The catch is that the recognition happens on their servers, the results usually stay inside their app, and you have to upload the whole archive to get it. For client work, family photos or anything under an NDA, that is a hard no.
2. Online keywording services for stock
Stock-oriented services generate keyword lists that are good for agencies, but you again upload every file, and the output is often tied to a specific export flow rather than to the photos on your own disk.
3. On-device AI that writes standard metadata
Modern vision models are now small enough to run on an ordinary laptop. Running one locally removes the upload problem entirely, and if the tool writes its results into standard XMP sidecar files, the keywords are not locked into yet another app. Your catalog software can read them, and they travel with the photos when you copy the folder to another drive.
That third option is what Tagloom is built for, and it is the workflow the rest of this guide uses.
A practical workflow, step by step
- Decide which folders matter first. Start with the archive you search most often, not the whole drive. A single trip or a single year is a good first batch: big enough to be useful, small enough to review.
- Install Tagloom and download a model once. On the Models page, pick the compact model if you have a large library or no dedicated graphics card; it is fast on a normal processor. The larger model writes richer descriptions but takes roughly three times as long per photo.
-
Choose your conventions in Settings. Set how many keywords each photo should get (15 is a
good default), the language the metadata should be written in, and the sidecar naming your software
expects. If you use Lightroom Classic or Bridge with RAW files, keep the Adobe style
(
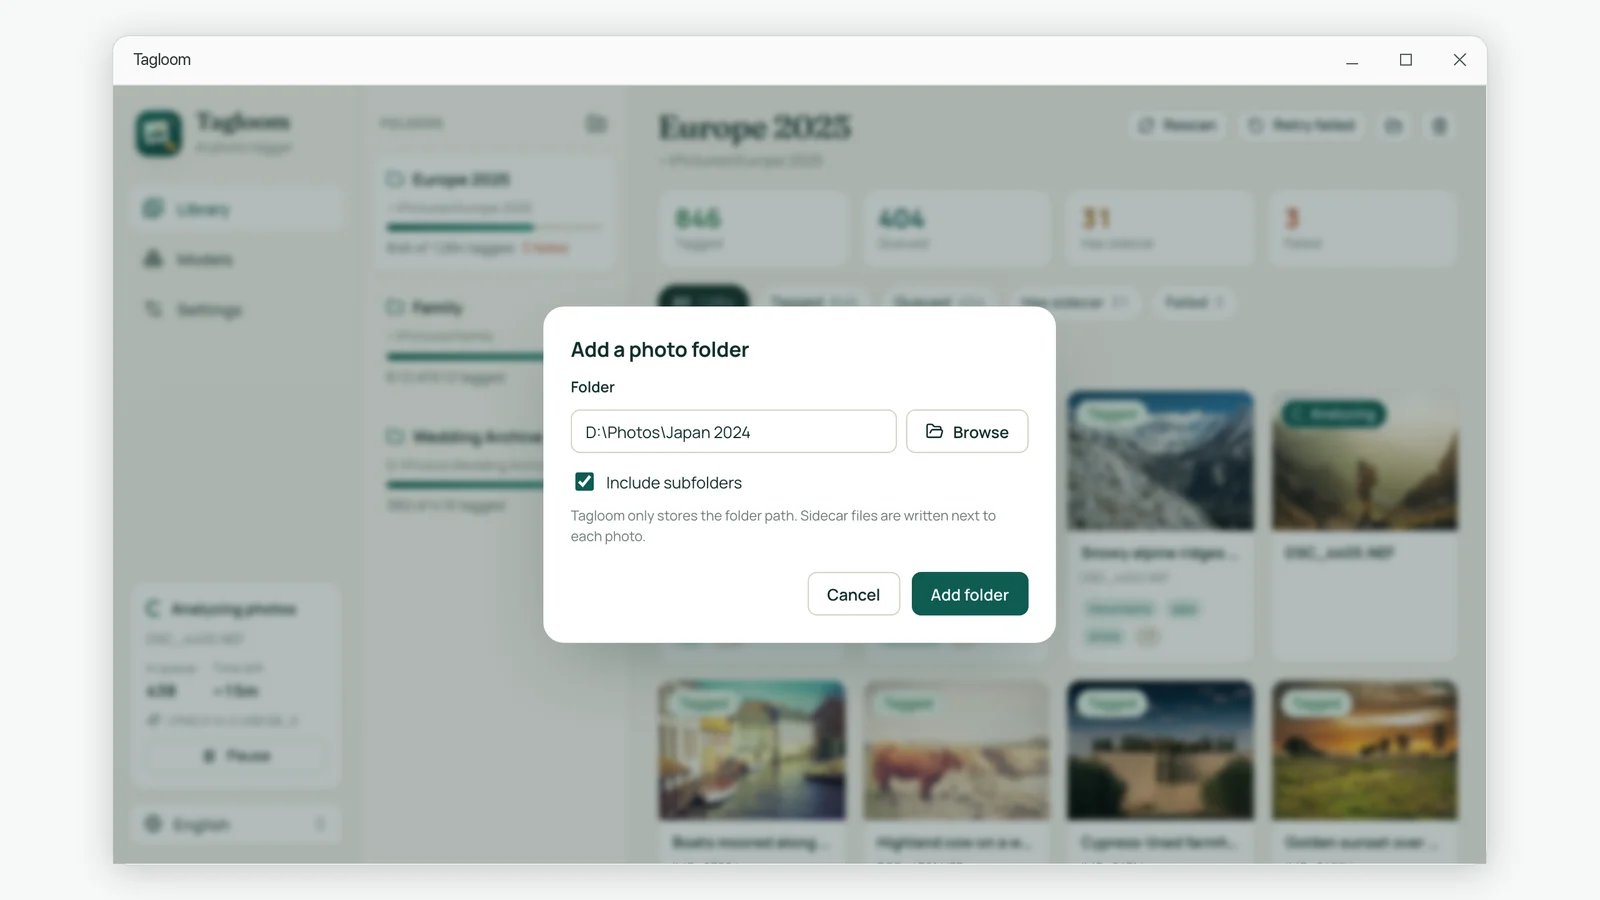
IMG_0001.xmp). If you use digiKam or darktable, choose the full file name style (IMG_0001.jpg.xmp). - Add the folder. Click the add folder button, pick the folder and leave "Include subfolders" ticked. Tagloom only remembers the path; it does not copy anything.
- Let it run in the background. The engine card in the sidebar shows which photo is being analyzed, how many are left in the queue and an estimate of the time remaining. You can pause at any moment and pick up later.
- Spot-check and refine. Open a handful of photos in the details panel. If a keyword is wrong, remove it; if something important is missing, add it, then save. The change is written straight back to the sidecar.
What you get for each photo
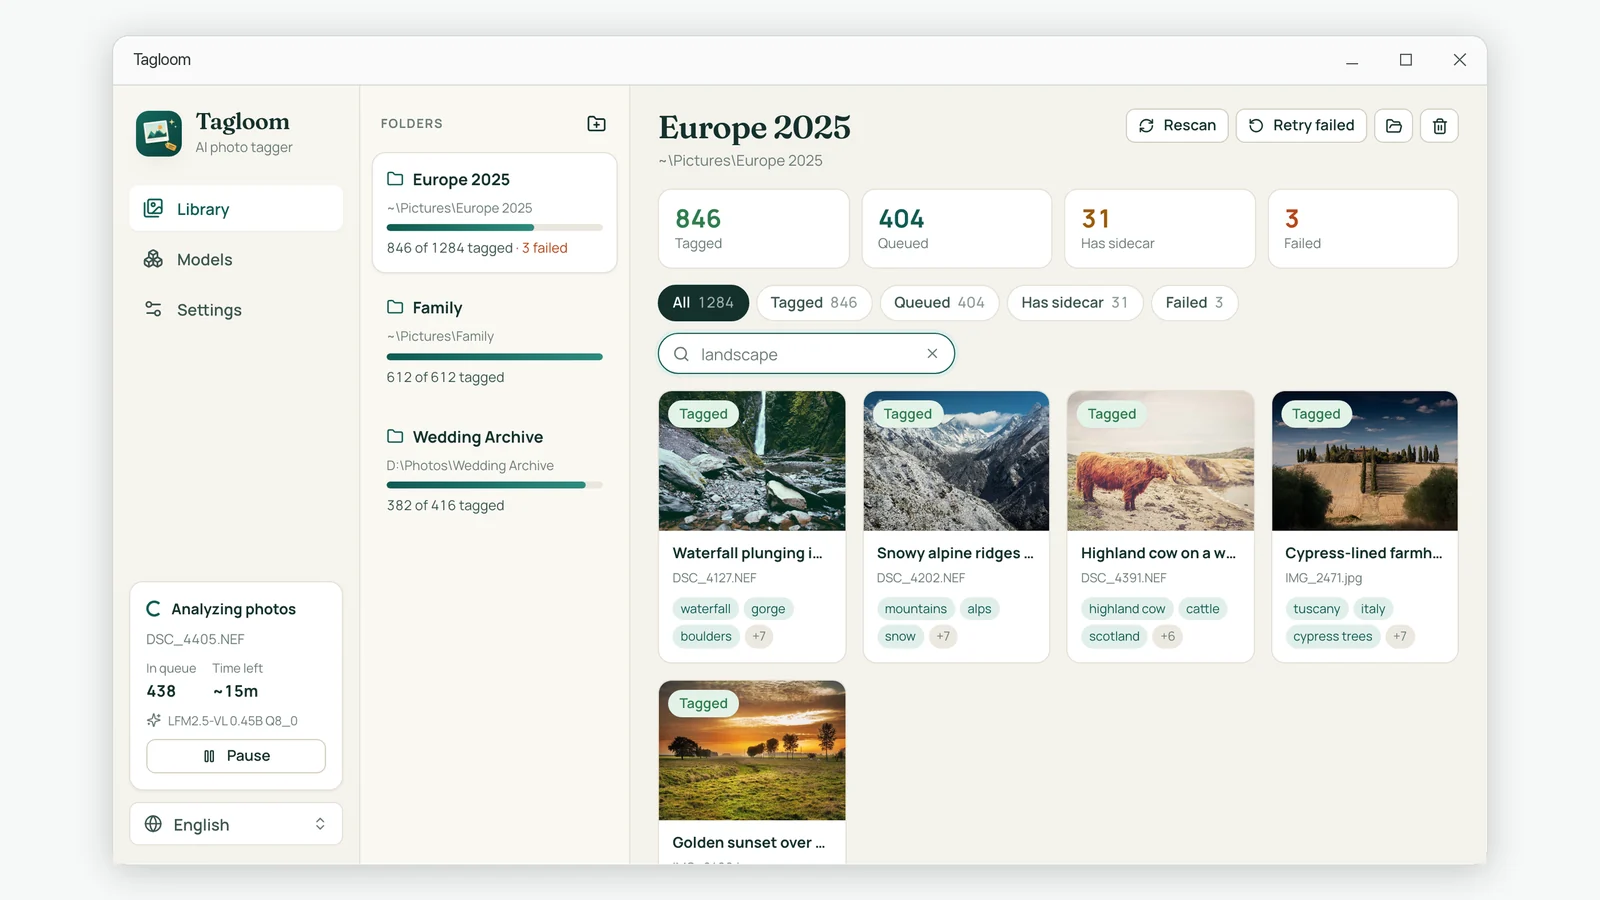
For every image Tagloom writes three things:
- A title of up to about eight words, such as "Waterfall plunging into a rocky gorge".
- A description of one or two plain sentences about subject, setting, action and mood.
- Keywords, most important first: subject, objects, setting, colors, season, mood and style.
These go into the standard Dublin Core fields of the XMP sidecar (dc:title,
dc:description and dc:subject), which is exactly where photo software looks for them.
Protecting the work you have already done
The biggest fear with any batch tool is that it will overwrite something. Tagloom follows a simple rule: if a photo already has a sidecar, it is skipped. If that sidecar was written by another application, for example Lightroom develop settings or captions you typed by hand, it is never modified, not even when you explicitly ask for that photo to be analyzed again. The photo simply shows up under the "Has sidecar" filter so you can see what was left alone.
Your original image files are only ever opened for reading. Removing the .xmp files Tagloom created puts the folder back exactly the way it was.
Tips for better automatic keywords
- Add context the camera cannot see. AI can tell a windmill from a lighthouse, but it cannot know the client name or the event. Add those few words yourself after tagging.
- Use the detail setting wisely. "Balanced" is right for most libraries. Switch to "Detailed" for product or macro shots where small objects matter.
- Keep the keyword count moderate. Fifteen strong keywords are easier to search than forty weak ones.
- Turn on folder watching. New photos dropped into a watched folder are queued automatically, so the archive never falls behind again.
Summary
Keywording thousands of photos by hand is not realistic, and uploading a private archive to a cloud service is often not acceptable. Running a vision model on your own PC and writing the results to XMP sidecars gives you searchable photos without either compromise. Start with one folder, check the results, and let the background queue handle the rest.